SwiftLists instruction guide
How SwiftLists Works
SwiftLists is built around one simple idea: your grocery list should be reusable. Instead of writing the same items again every week, you keep your staples in the app, turn them back on when you need them, share the list with the people who shop with you, and check items off as they go into the cart.
Before you begin
- Download SwiftLists on iPhone or Android and sign in so your lists can sync.
- Think of the first list you want to make, such as Groceries, Costco, Target, School Snacks, or Vacation.
- Decide whether checked items should stay visible or disappear while you shop.
- If you want to share a list, have the other person's email ready.
Step 1
Create your first reusable list.
Start with one list you will use again and again. A reusable grocery list saves time because your regular items stay available for the next trip instead of being deleted forever.
Tap the add button to create a new list.
Give the list a clear name, like Weekly Groceries, Trader Joe's, Costco, or Household Supplies.
Add an optional note.
Use notes for meal ideas, shopping reminders, delivery instructions, or anything the person shopping should know.
Choose whether to hide checked items.
Turn on Hide Checked Items if you want bought items to disappear while you shop. This keeps the active list short and focused.
Pick a group.
Choose the kind of list you are making. Grocery lists can use categories so produce, dairy, frozen, and pantry items stay organized.
Save the list.
Once the list has a name and group, save it. It will appear on your home screen whenever you need it again.
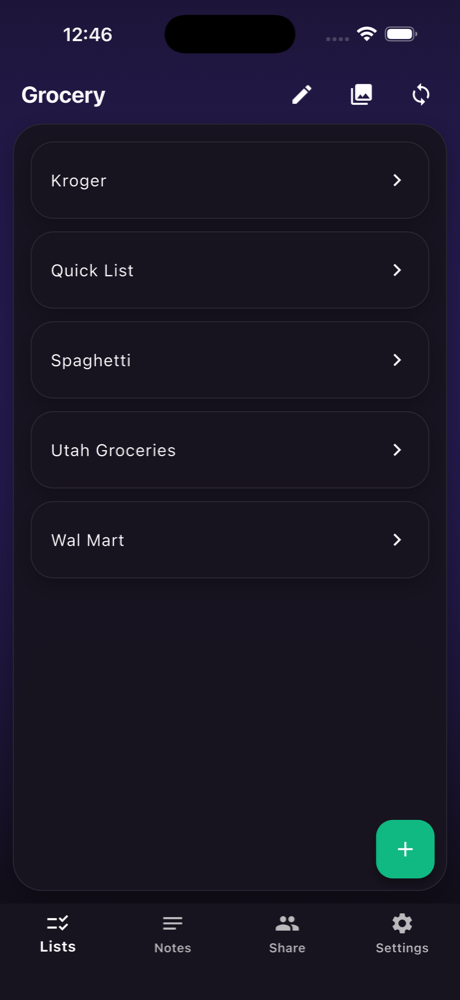
Your lists stay ready for the next errand.
Step 2
Add groceries as soon as you think of them.
SwiftLists works best when the list catches items throughout the week. Add milk when it runs low, lunch snacks when school is coming up, and household basics before the last one is gone.
Open the list.
Tap your grocery list from the home screen. The list opens with your existing items and a place to add more.
Start typing an item.
SwiftLists searches the list as you type, which helps prevent duplicates and makes it easier to reuse existing items.
Add the item.
If the item is new, tap Add. If it already exists, use the matching item instead of creating another copy.
Set quantity or category when needed.
For grocery lists, use categories to make shopping faster. Add quantities for items like 2 apples, 3 yogurts, or 4 cans.
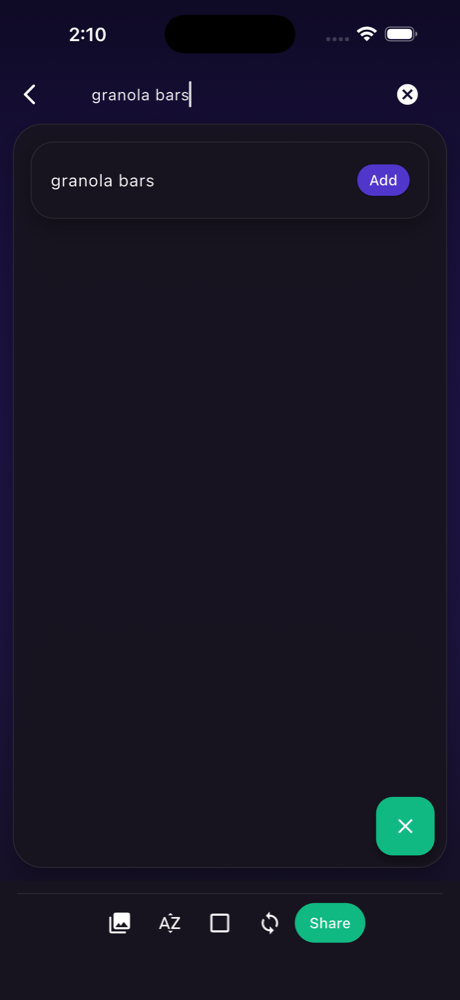
Search before adding so your list stays clean.
Step 3
Shop from the list and check items off.
At the store, SwiftLists becomes a focused shopping checklist. You can move through the aisles, check items off, and keep the remaining list easy to read.
Sort by category.
Group groceries by category so produce, meat, dairy, frozen, pantry, and household items are easier to scan.
Check off each item as it goes into the cart.
Checked items can either stay visible or disappear, depending on your list setting.
Pull down to refresh when sharing.
Shared lists sync, so another person can add something while you are shopping and you can refresh the list.
Reuse checked items next time.
The biggest benefit is that your staples are still there. Turn them back on the next time you need them.
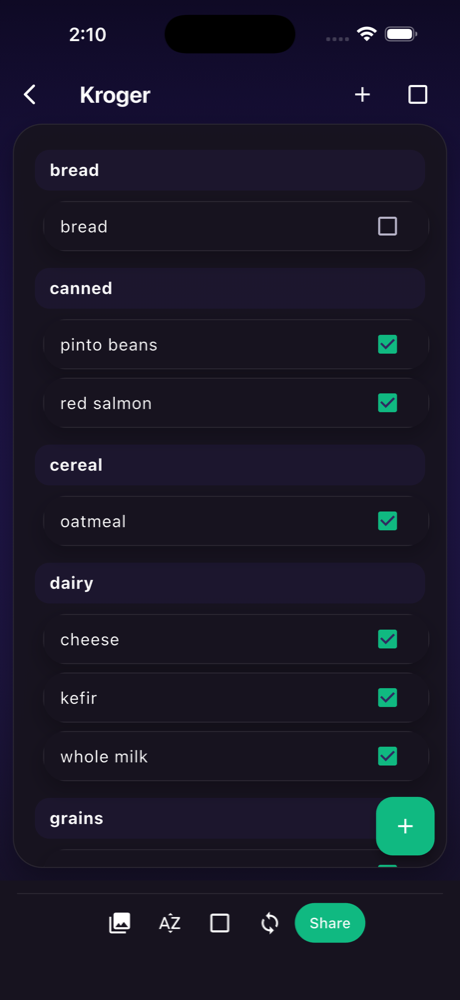
Category sorting turns a long list into a store-friendly plan.
Step 4
Share lists with family, roommates, or anyone who shops with you.
Shared grocery lists reduce the mental load. Instead of texting last-minute requests, everyone can add what they need directly to the same list.
Open the share area.
Use the Share tab or sharing controls for the list you want another person to use.
Enter an email address.
If the person is already connected to you in SwiftLists, you can share the list. If not, send an invite by email.
Let everyone add and check off items.
A shared list works like a normal list, except more than one person can keep it updated.
Watch for the people icon.
Shared lists show a people icon so you can tell which lists belong to more than one shopper.
Why sharing helps
- Fewer duplicate purchases.
- Fewer "can you also grab..." texts.
- One list for couples, families, roommates, or caregivers.
- Easier shopping when someone else goes to the store.
Step 5
Edit, reset, and manage your lists over time.
SwiftLists is designed for repeated use, so the cleanup tools matter. Keep old staples, remove what you no longer buy, and reset a list quickly before the next trip.
Swipe to edit an item or list.
Use the edit action to rename items, change quantities, update categories, or adjust list details.
Use bulk actions after a big shop.
Check all, uncheck all, or delete checked items when you want to reset the list for the next week.
Keep separate lists for separate jobs.
A weekly grocery list, Costco list, travel packing list, and household restock list are easier than one giant note.
Let SwiftLists work offline.
You can keep using the app in stores with weak service. Changes sync later when the connection returns.
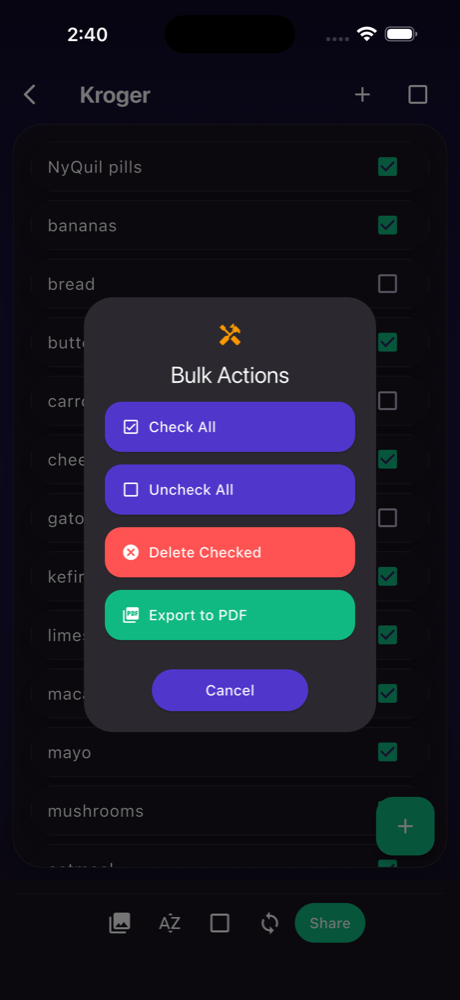
Bulk actions help reset a reusable list quickly.
The payoff
Spend less time rebuilding lists and more time shopping from a plan.
SwiftLists helps you capture what the household needs, organize the trip, share the work, and reuse the same list week after week. That is the difference between a one-time checklist and a grocery list app that actually fits real life.

